Here’s a quick guide on how to use the Insanity Player to upload content to the website
First, upload your show to MixCloud like you normally would. You can use any MixCloud account, it won’t matter.
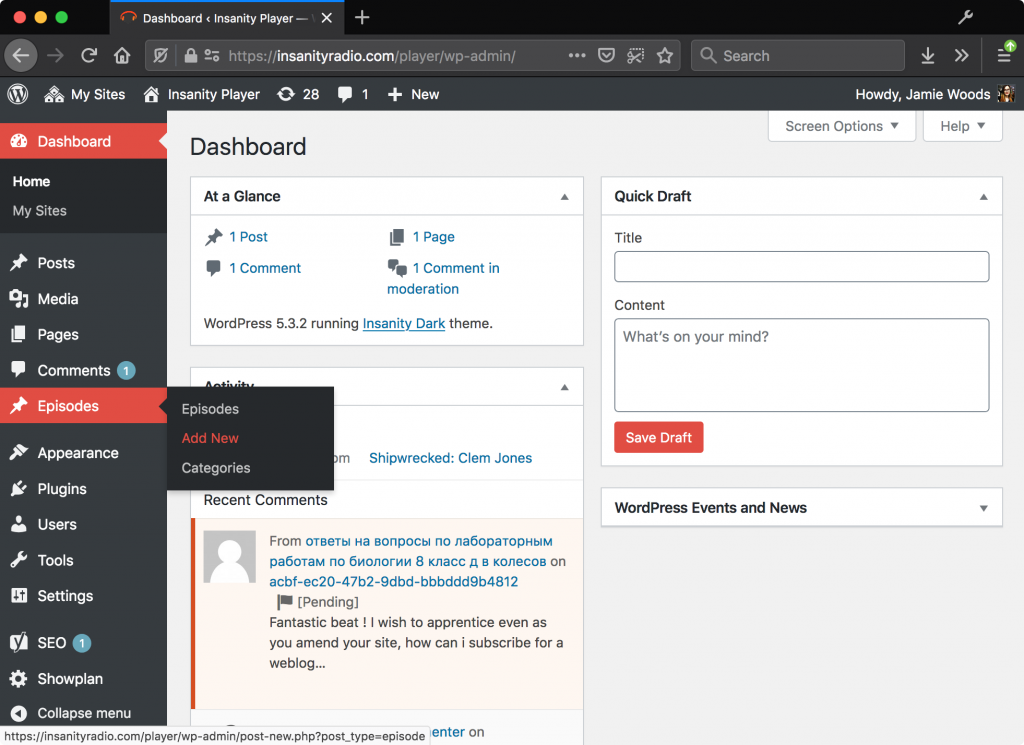
Go to the Insanity Player admin page – https://insanityradio.com/player/wp-admin/
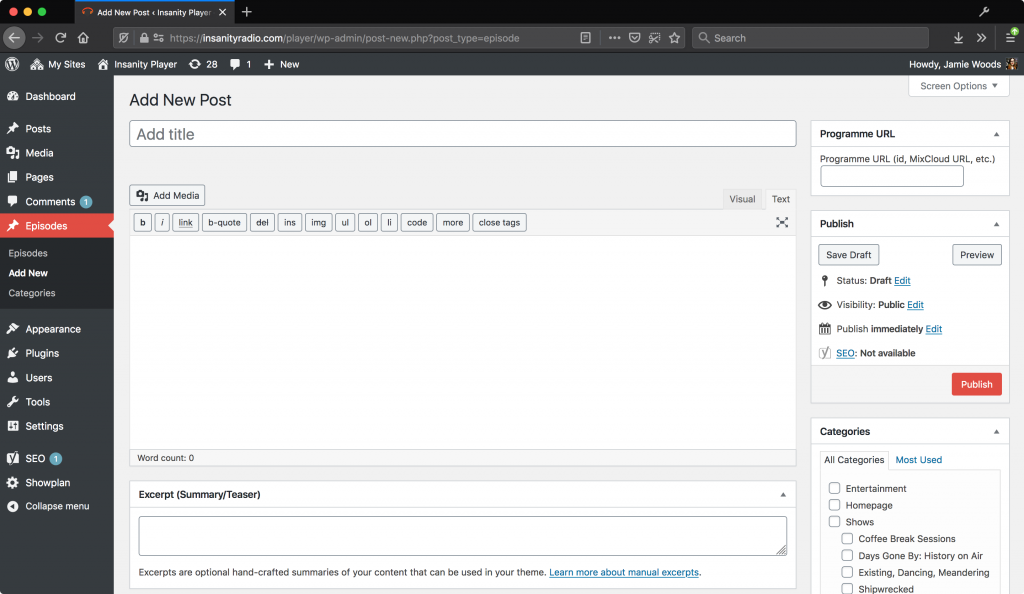
Under “Episodes”, click “Add New”. This will take us to a form that looks like this.
Copy the link to your MixCloud upload, and paste it in the “Programme URL” box.
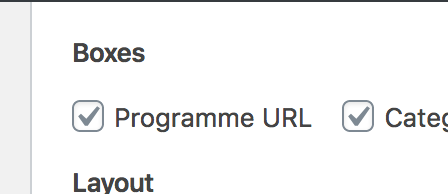
If you don’t have a Programme URL box (this may happen if you’re uploading your first show), click “Screen Options” and make sure that you have the Box for it, like below:
Now we can enter the title, a description, and an excerpt.
We’re nearly there – just two more things to do.
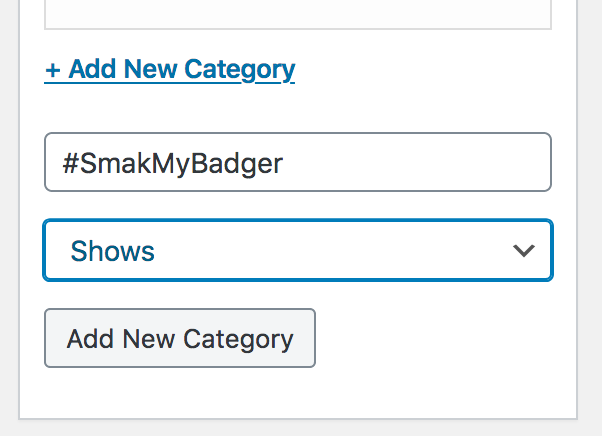
First, we need to select a “Category”. If you don’t see your show in the list, click “Add New”.
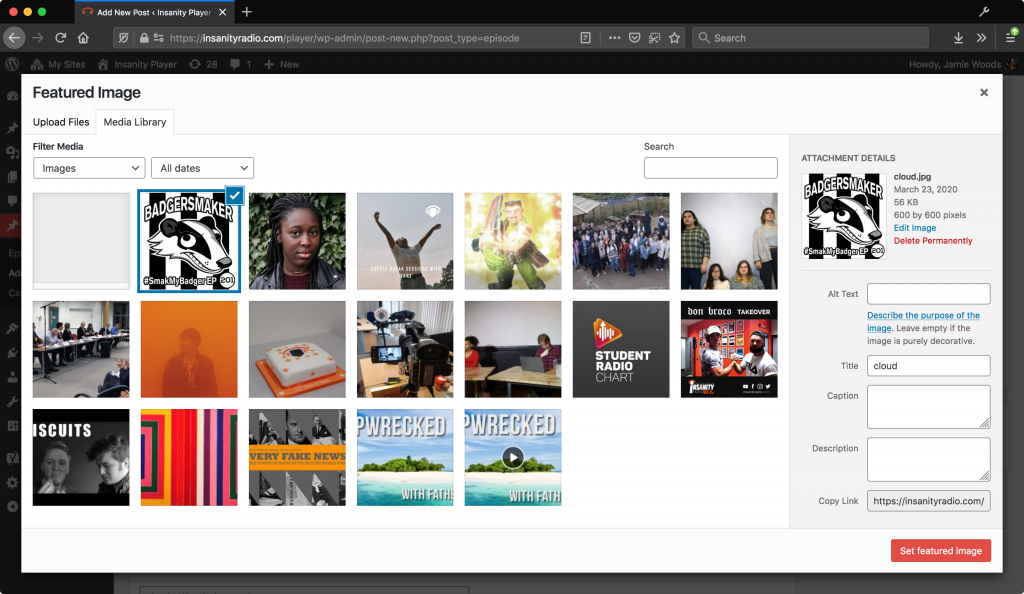
Next, we need to upload a photo. Click Change Featured Image and you can select an image.
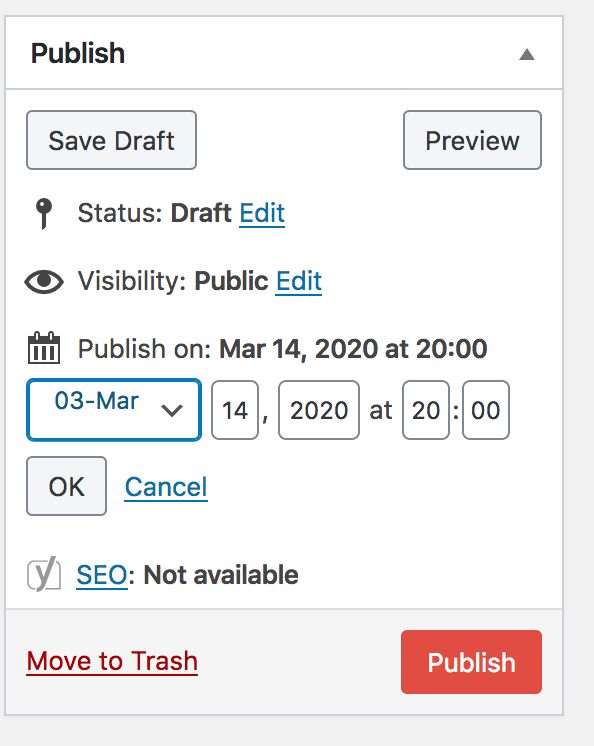
Finally, we need to enter the time it was broadcast. To do this, click Edit next to “publish immediately”.
To conclude, make sure you’ve done the following
Entered a MixCloud URL
Entered a title, description and excerpt
Changed the date to match
Entered a category
Entered a photo
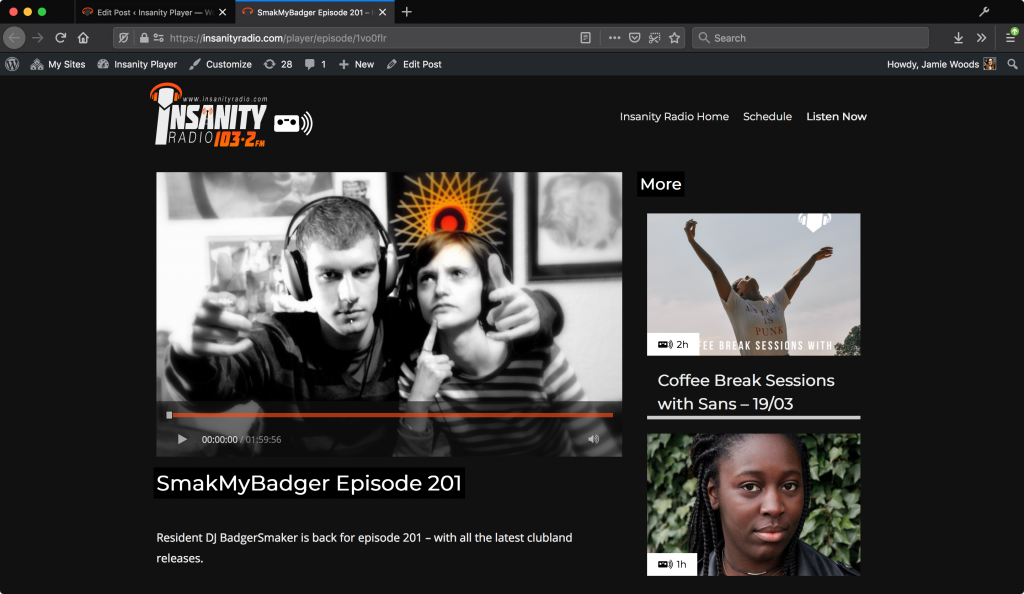
Now, we can click “Publish”, and it will go live immediately! 🎉
If you can’t make it to the studio, the last option is to record your show from home. This post will explain how to do it.
Your Microphone
Before we start, we’re going to need a reasonably good quality microphone. If you’re a media nerd like me (or if you might want to venture into podcasting) you could choose to invest in a good quality microphone, but I’ve had a hunt for some good cheap microphones.
The one built into your laptop or phone (or AirPods) unfortunately is nowhere near good enough. You’re also going to want to be able to use your headphones at the same time so you can hear the music.
We have a few kits that can be borrowed short-term, but in the current climate it may be worth investing in something for the longer haul.
Low Cost
The best quality low cost microphones we can find are here. If you’re doing radio for the first time, have a look at these.
Behringer C-1U (£38) Like many broadcast engineers, I don’t normally have a lot of good to say about Behringer, and have had a lot of bad experiences with their hardware failing just after the end of the limited warranty. But for the price this is a good entry level microphone and is probably the cheapest you can get, and the overall sound quality is good.
Rode Smartlav+(on deal at £38 + £11, £49) The Smartlav is a clip on microphone that sounds incredibly good for its price. However, to use it with headphones on your laptop/tablet you need to purchase an additional £11 adapter which is a bit annoying.
One important note is that the Smartlav only works on laptops that let you use a headset mic like Apple headphone – although most laptops now have headset jacks instead of headphone jacks this could catch you out.
Editor’s Pick: Marantz Pro USB (£49) I’ve heard from a LOT of radio techies that this microphone is just fantastic for the price, and really does give you studio-like quality at an entry-level price.
Higher Cost
To be honest, the more money a microphone costs, the better the sound quality you’re going to get for it. Although there are some exceptions to this rule – some microphones sound incredible at a fraction of the cost. And here they are.
Samson SAQ2U(£79 on Amazon) Samson have been releasing some fantastic microphones over the last few years, and the Q2U has quickly become a podcaster’s favourite. You can plug it directly into your computer with USB, or into another mixer. It has a headphone port built into it too so it’s already better than your phone!
Samson G-Track Pro (£165 on Amazon) This microphone, although our most expensive, is an incredibly strong bit of hardware and, if you want to get that studio quality from home for your show or podcast, this could be the one for you.
You can continue to upload music through Nerve like normal.
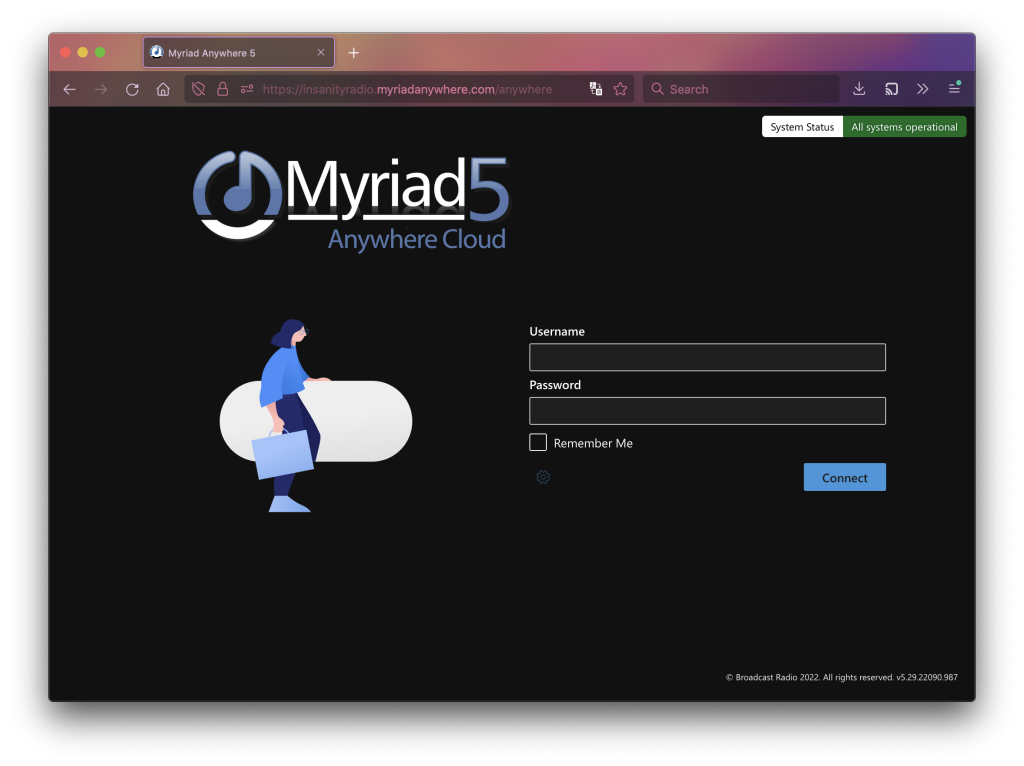
Log in with your normal username and password.
If you get an error message saying your username and password isn’t correct, you might not have the right account set up yet. It’s really easy to do, log onto the Account Portal and you will have the option to enable a Myriad account. It should then work immediately.
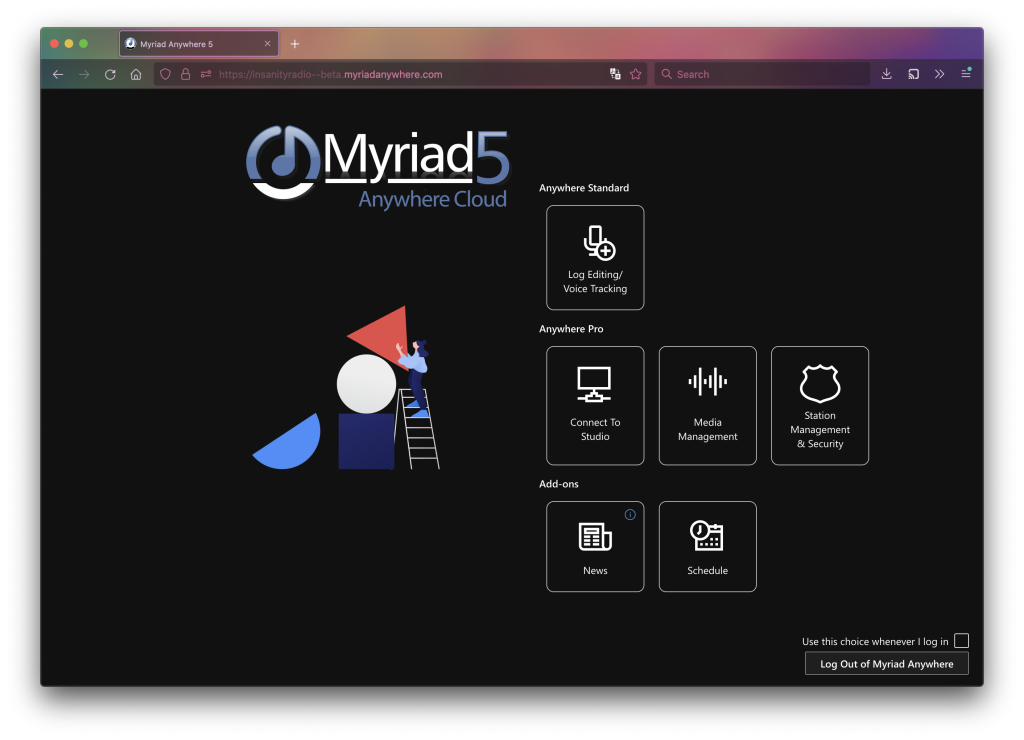
You may be asked to choose an option. Choose Log Editing/Voice Tracking.
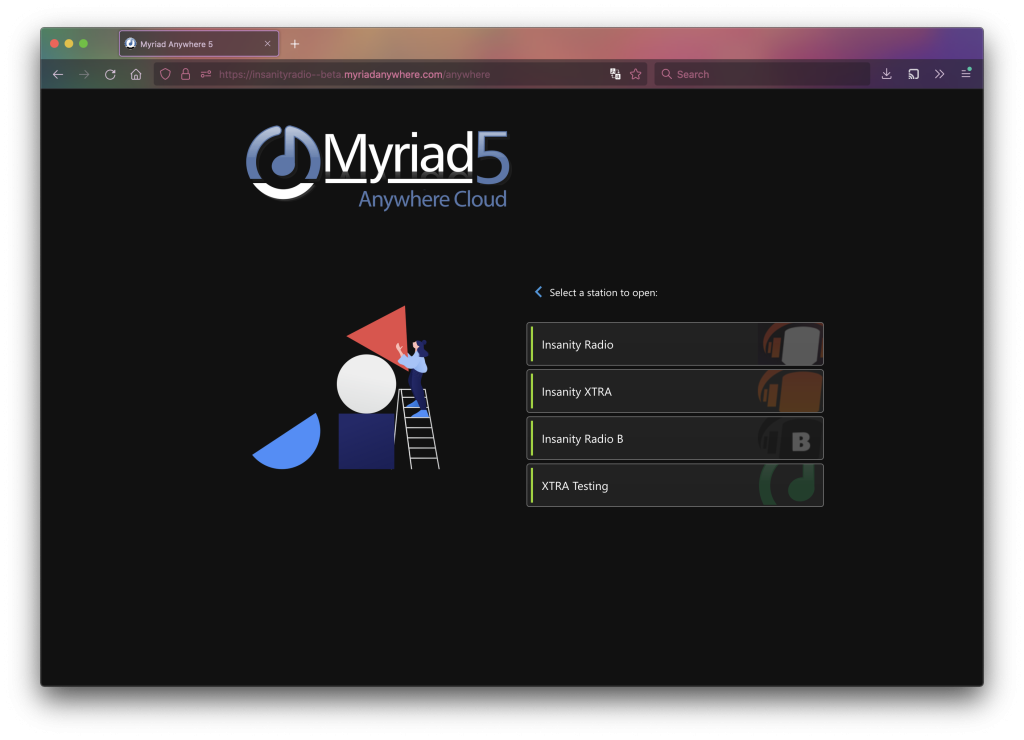
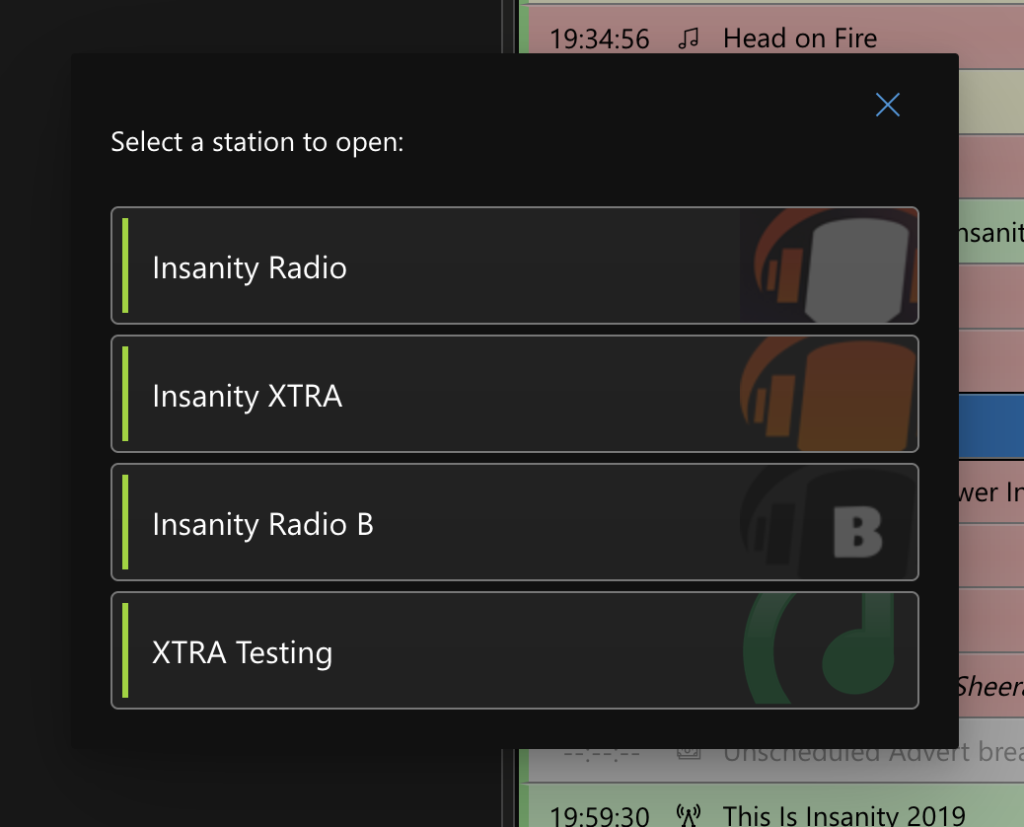
We now need to pick a station to use. First, let’s open Insanity XTRA so we can set everything up and make sure it works! Insanity XTRA is our virtual training station – nothing you record into it will go public.
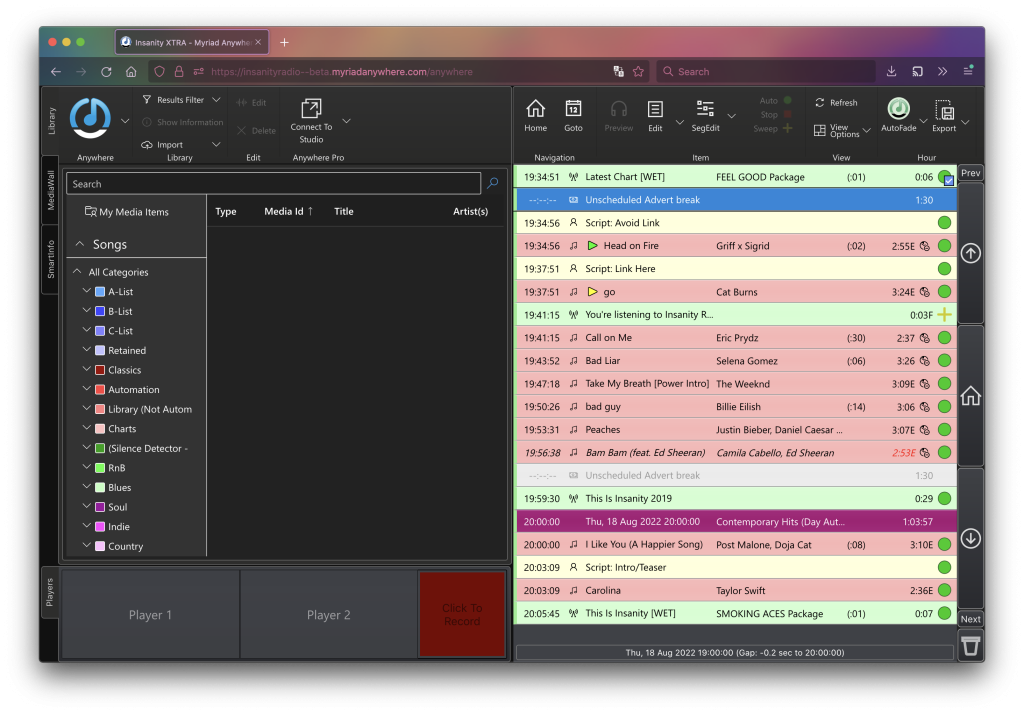
Once it’s finished setting up, you will see the station log on the right. Because this is “Insanity Training” the log is a copy of all the logs from a few days ago, we can make changes here without having an impact on air.
If you’re not sure you opened the right station, click the top left menu button and press Change Station.
We’re in!
Myriad Anywhere aims to be as close to the desktop experience as possible.
As such, you can pretty much log your show like normal, and by uploading songs through Nerve you don’t need to be on site to record your show!
As we’re on the training database, let’s not start planning our actual show yet, as none of the changes we make will go on air.
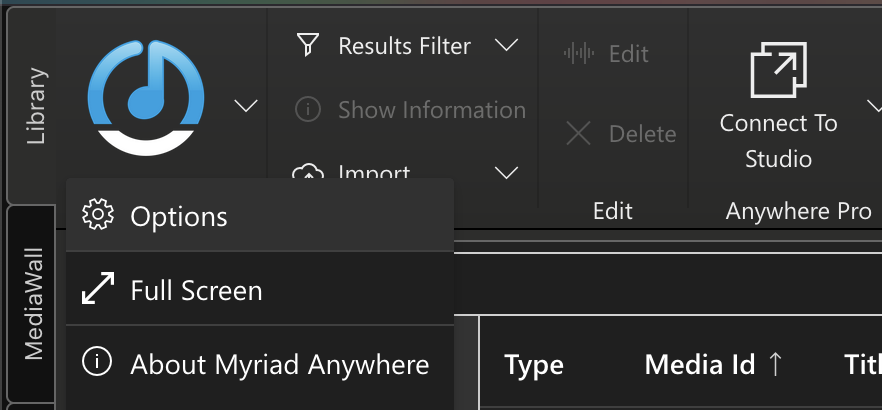
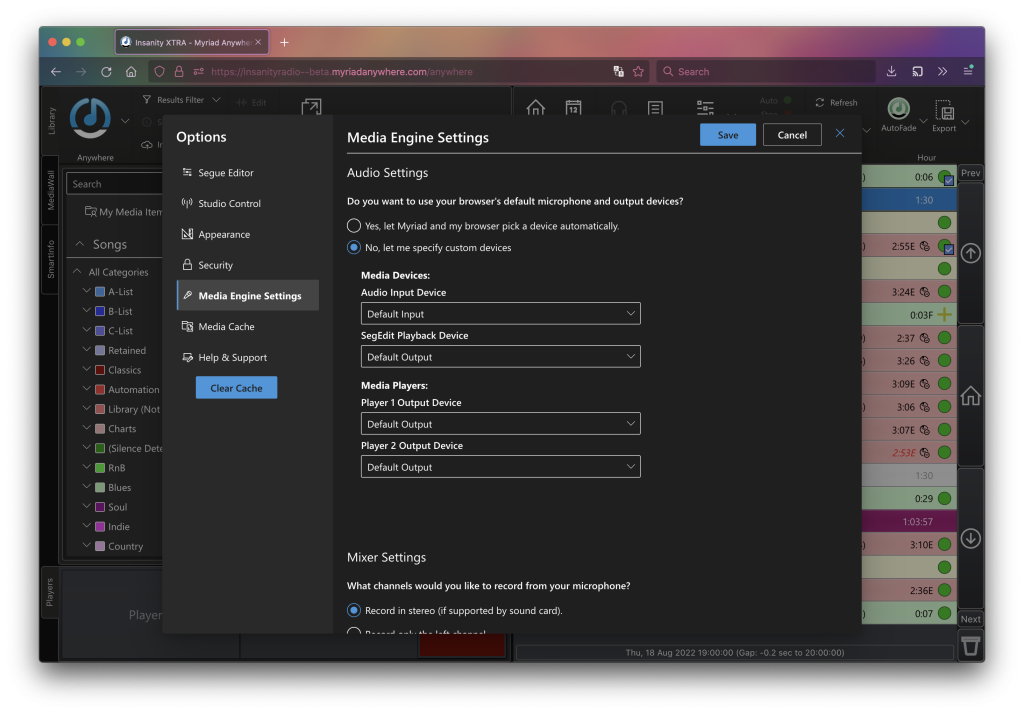
Open the Options menu, and go to “Media Engine Settings”.
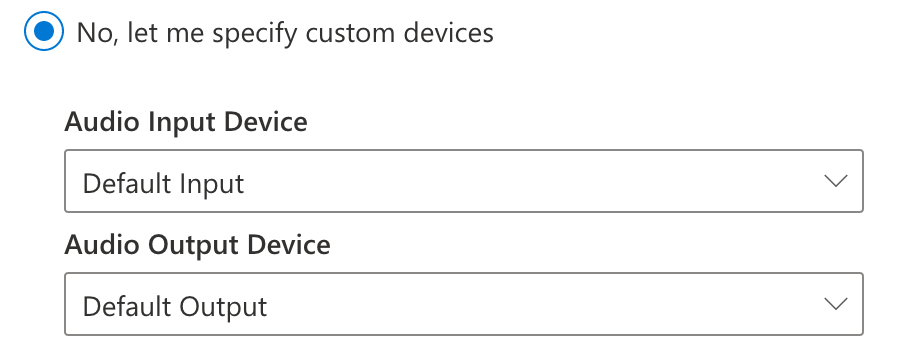
Select “No, let me specify custom devices” near the top. This will let us tell the system that we’re using our own microphone. Otherwise, it may use the one that’s built into your laptop, and the resulting quality would be bad.
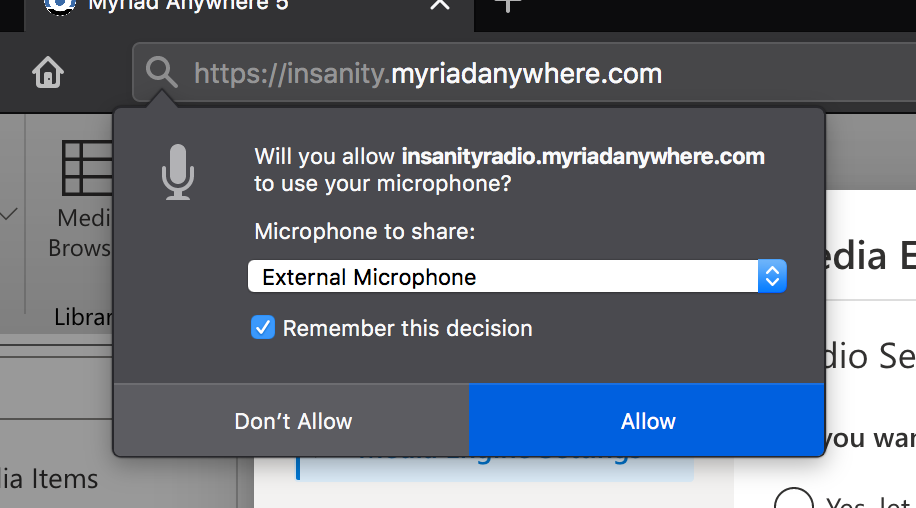
If you’re logging in for the first time, you may see this dialog. It’s completely normal to see this, but make sure to check a “Remember” option if it gives you one!
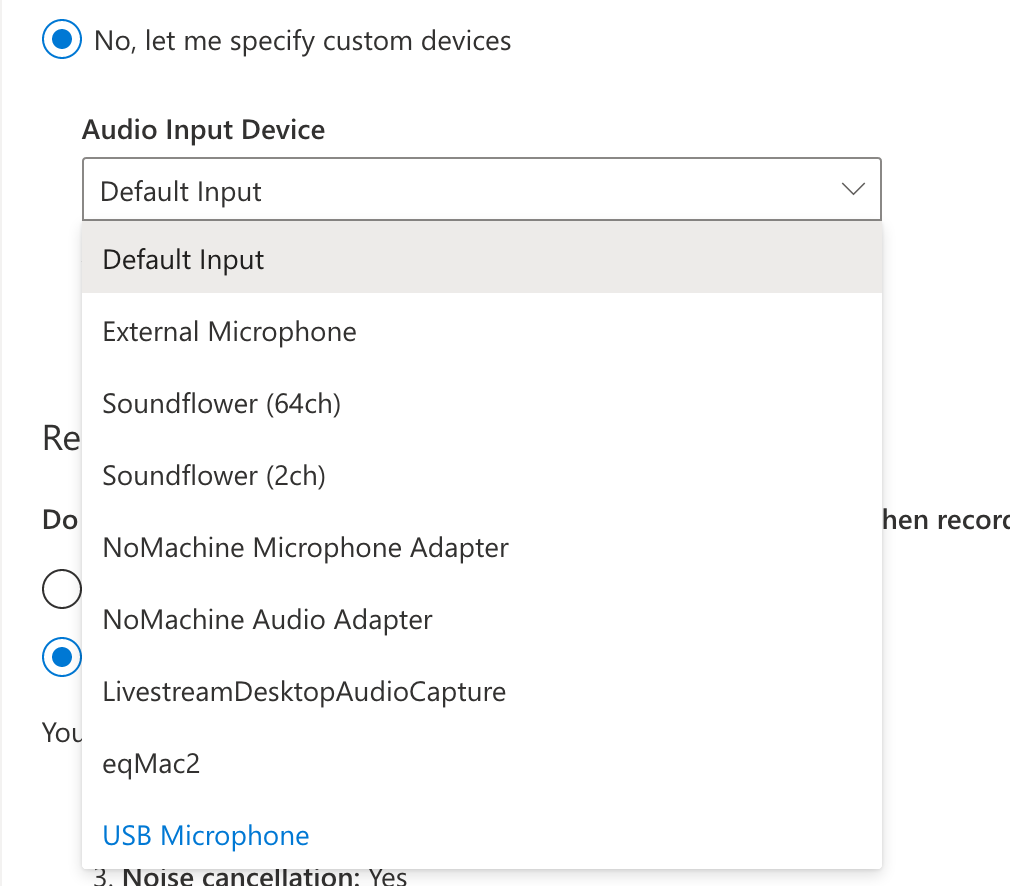
Now let’s click “Audio Input” and find our microphone!
Mine has shown up as “USB Microphone”. Click this and, optionally, change the output device too if you need to (for example, if you have a mixer, or if your microphone has a headphone socket).
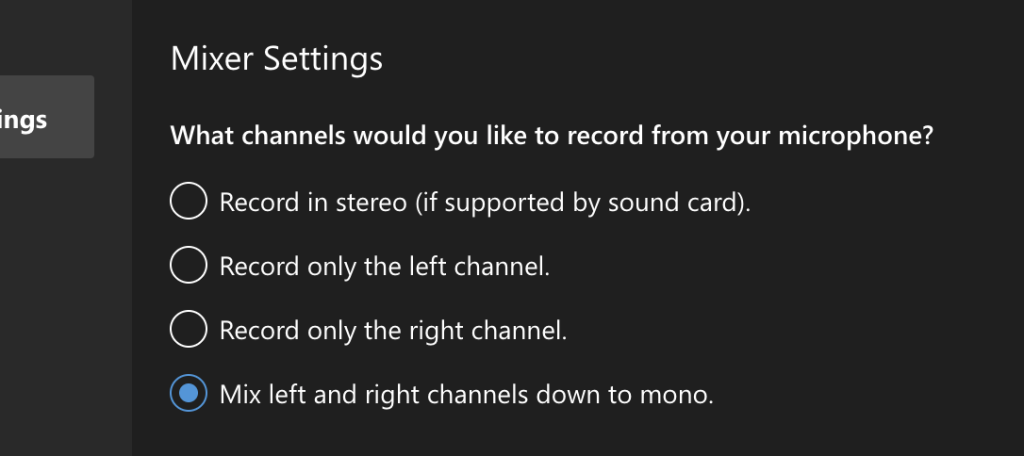
Finally (and importantly) make sure you choose Mix left and right channels down to mono. Some microphones will only record on the left or right side, and this can trip the silence detector. If you have two microphones plugged in, you might get one on the left, and one on the right. By making the microphone mono rather than stereo, this can’t happen.
Then click “Save” on the right to exit the settings window.
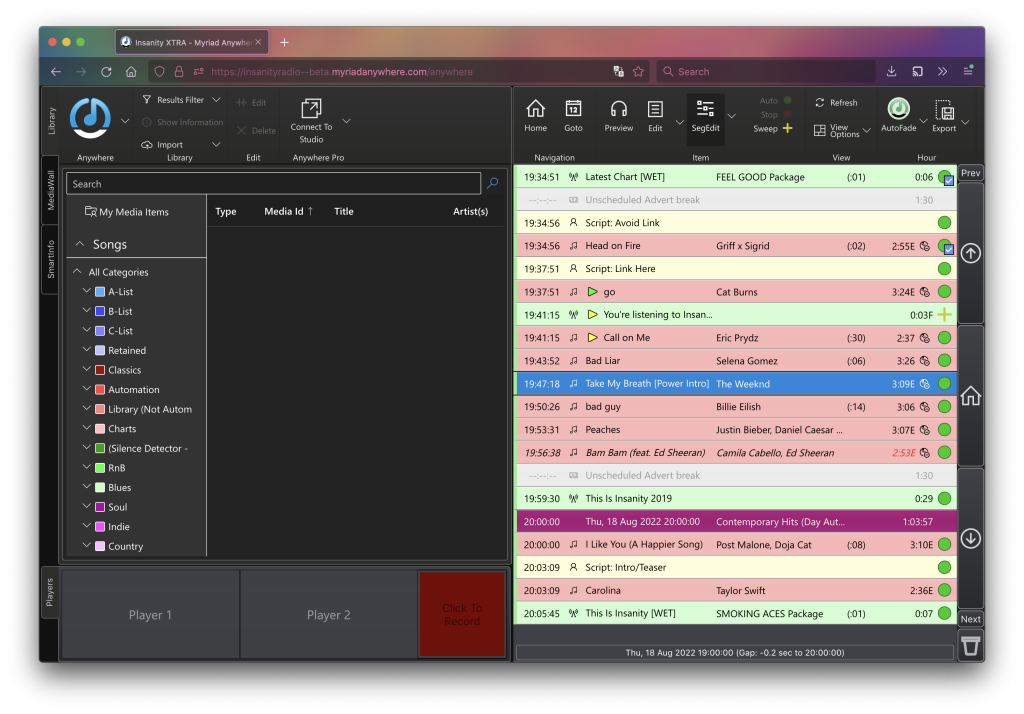
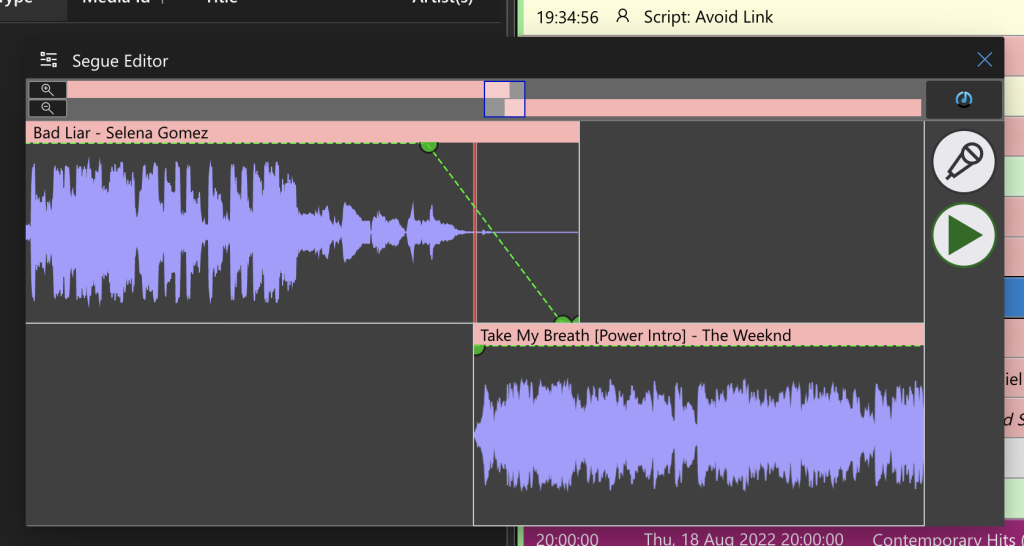
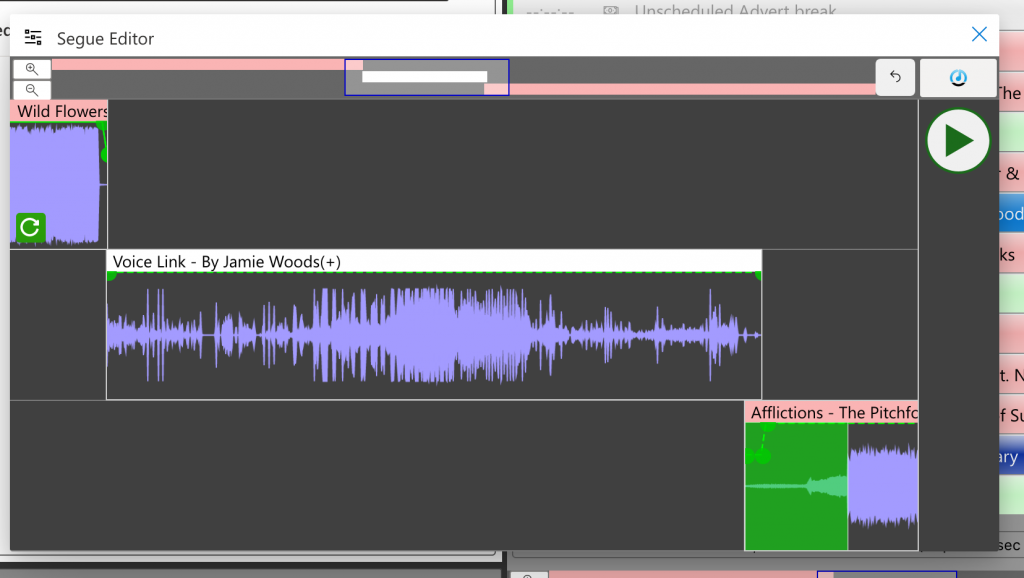
To record a link between two songs, select the song you want to record before and double click it. For instance, if I want to record between Bad Liar and Take My Breath I’ll double click Blinding Lights.
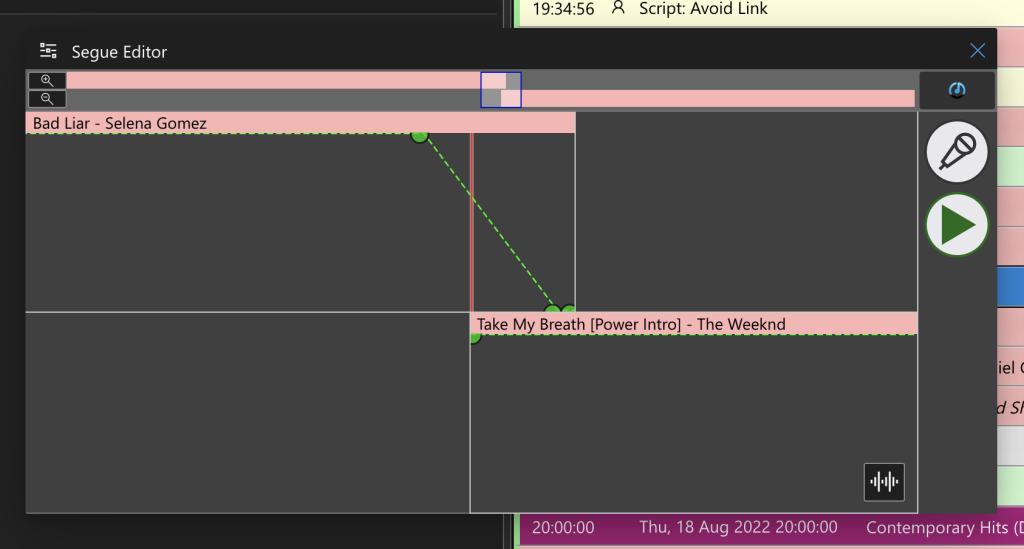
This will open the “Segue Editor”.
To make loading faster, songs might appear blank like in the following screenshot. This is normal – you can click the “wave” button on the bottom and the system will download the songs for you.
Once the downloads have completed (this might take a few seconds depending on the speed of your internet), we can now see the songs! 🎉
Click the “Play” button to have a listen to the segue as it would sound.
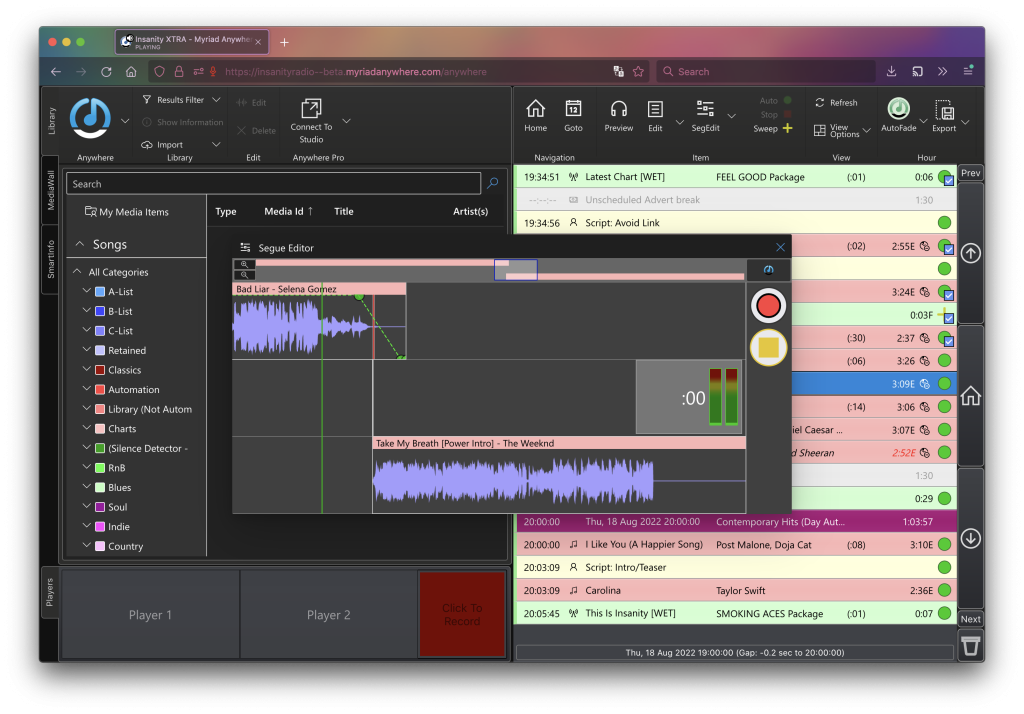
We can also record a voice link to get some practice. To do this, click the microphone button. It will transform into a red dot.
It will automatically start recording when the microphone picks up sound, but it will also start recording when you click the red record button (or press the space bar).
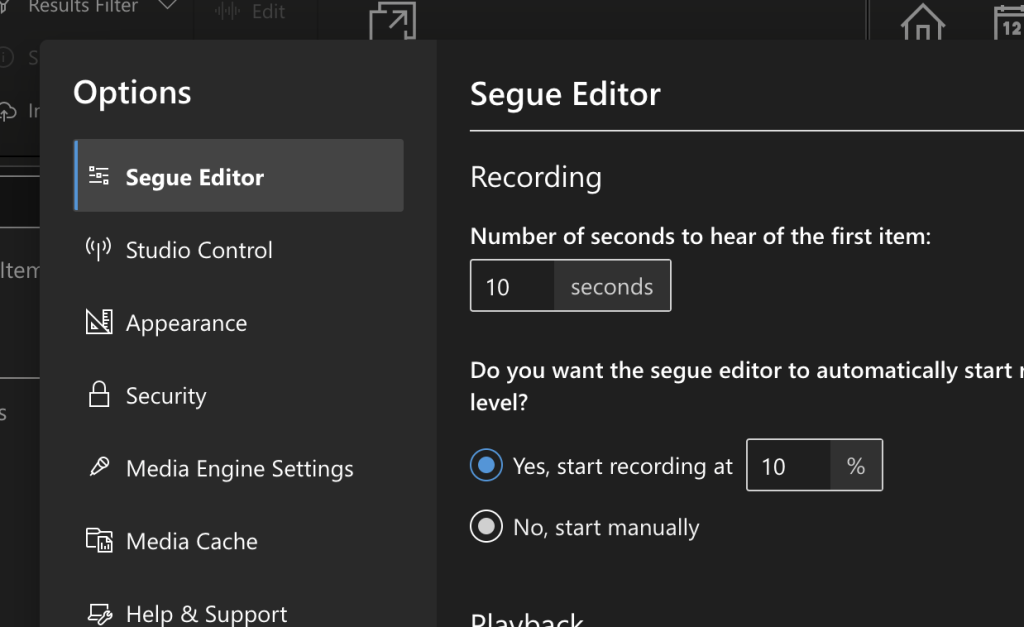
If you’re in a noisy environment it can be a bit over sensitive and start recording too soon. Although this doesn’t really matter, you can go to Options and change the automatically start recording setting
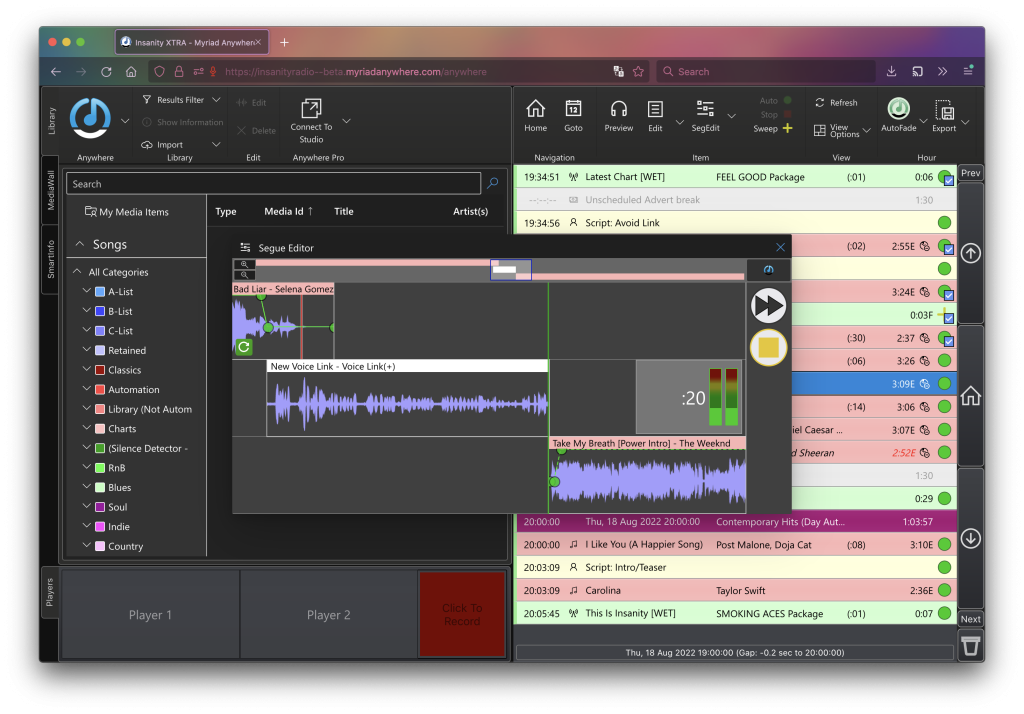
Once you’ve finished saying what you want to, click the fast forward button. This will start the next song – so you could also click the button to talk over the intro. In fact, I’m going to re-record that VL. Once you’re done, click stop. If you’re happy with what you recorded, click the tick button. To delete it (warning: permanently!) click the cross.
Once you’ve hit save, you’ll see it appear in the log.
Recording For Real
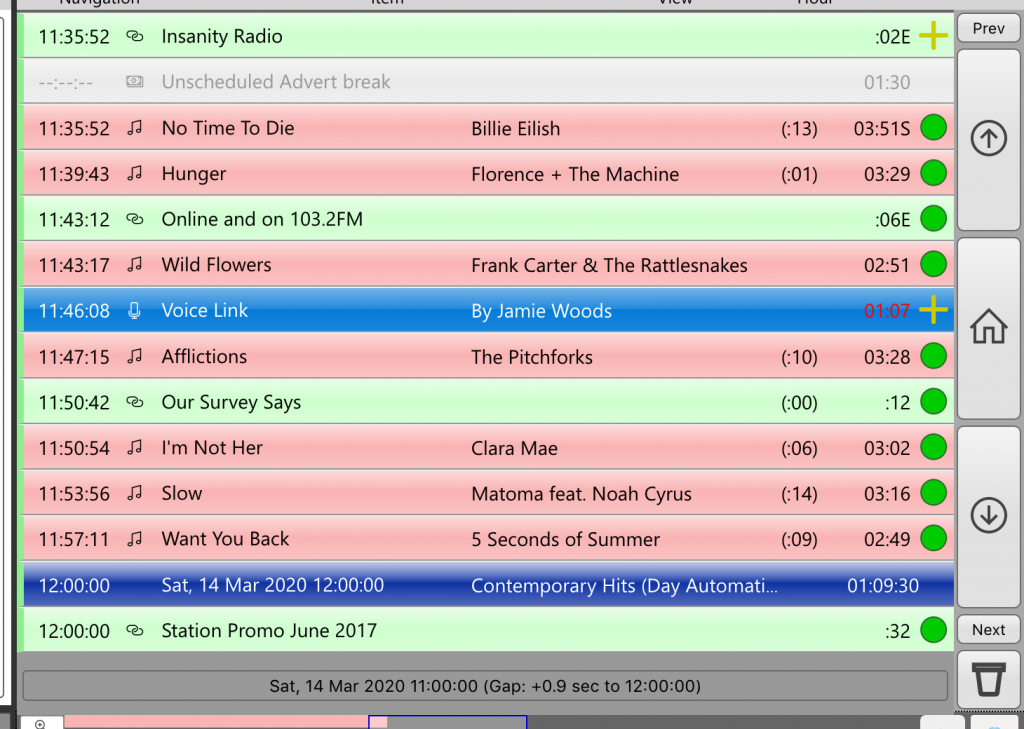
Make sure you’ve opened “Insanity Radio” as a station (click the blue menu button if you’re not sure). If you don’t open the main Insanity station, your recordings will never make it to air.
Let’s log our show. Exactly as we would on Myriad, click “Goto” and enter the date/time of our show. Unless you want to keep them, delete all the existing songs out of the hour by dragging them into the bin or pressing delete. Log your songs like normal, but make sure to leave the hour in AutoFade.
If we put the hour in Live, we may inadvertently add stops into the log or mess up the timings for the next show. Remember that leaving stops during pre-records can cause radio silence so please avoid putting red squares/stops in.
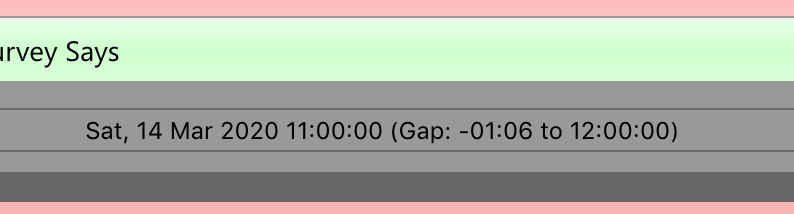
Remember that the gap timer will tell you if your show is too short or too long (ie. overrun/underrun).
Right now, we can see a gap of “-01:06”, which means we have space to record 1 minutes and 6 seconds of links this hour. As it’s hard to time your recordings perfectly, it’s better for the gap to be positive (aka “+XX:XX”) than negative, as then the system can trim the songs to make the show run to time.
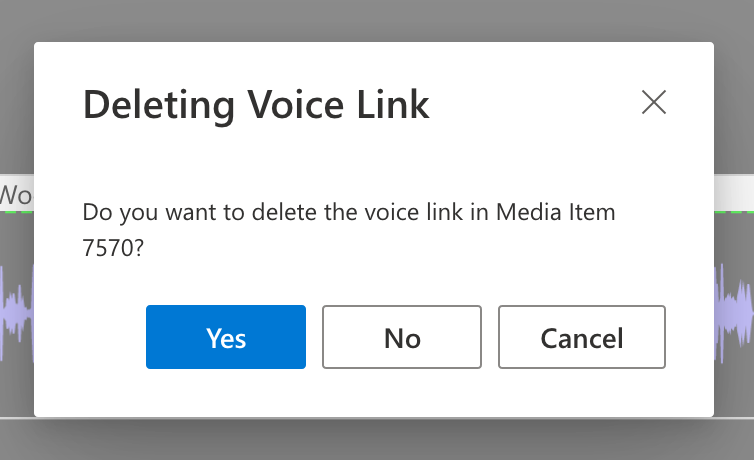
Once you’ve recorded a voice link, it’s good to go. However, if you wish to delete it, click the back arrow on the top bar in SegEdit.
The system will give you the option to keep or delete the recording. If you want to keep the recording (maybe for future editing/use if it was a good one otherwise) click No.
And that’s basically it! You’ll hear your own voice on the radio when you’re miles away from the studio, how proper weird.