Manual Vision Mixing
If you’re doing a planned visualised segment, chances are you’ll want to manually control which cameras are live. This is called vision mixing.
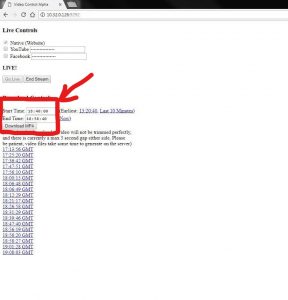
Insanity uses a bit of kit it built called automix to control the cameras, but you can manually override it. To do that, open a web browser, and go to http://10.32.0.125:9292 . This can only be done from an Insanity network connected PC (so any one in the office or studios).
This’ll show you a page somewhat like this.
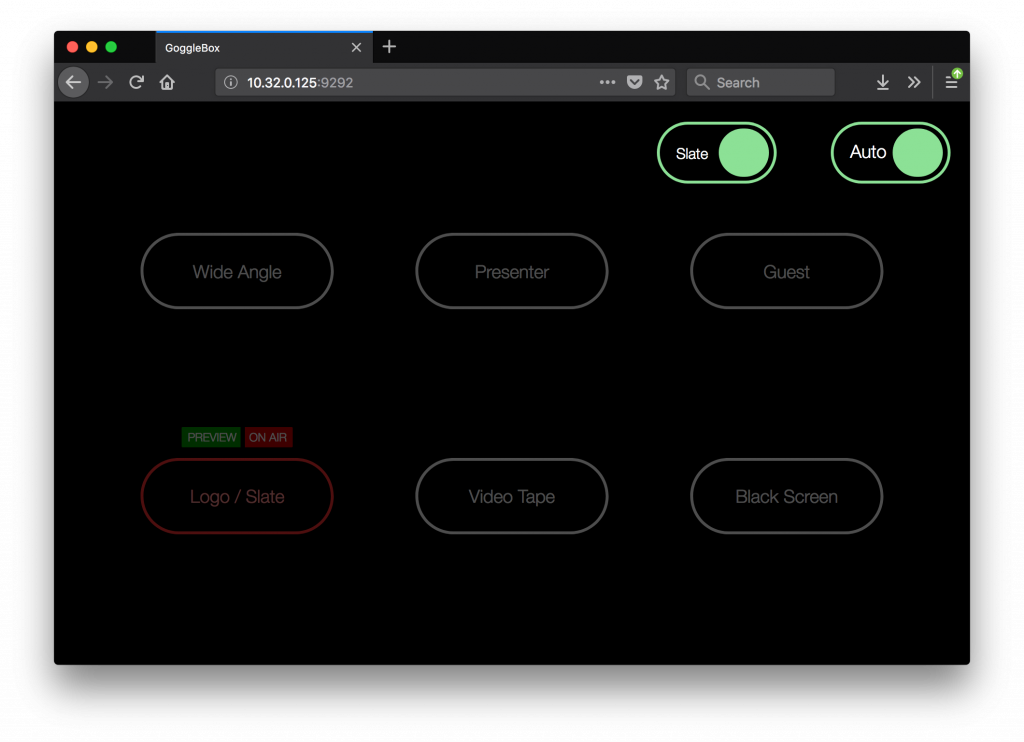
automix remote control – GoggleBox.
When you close the GoggleBox web-page, the camera settings will revert back to default.
In the above screenshot, the cameras are in Auto mode.
None of what we can adjust on this page affects sound.
Turning Off the Slate
The slate is the “holding picture” (currently a vinyl with the classic Insanity headphones) used when the cameras and microphones aren’t live. If we want to override this so that the cameras are always live, we can click the toggle button labelled “Slate”, which will change to “Wide”. In the “Wide” mode, the wide angle camera will always be live when the microphones are off.
Manually Selecting Cameras
Click the “Auto” toggle button. It will slide to “Manual”, and change colour to grey. The other buttons will become visible again, and you can click them.
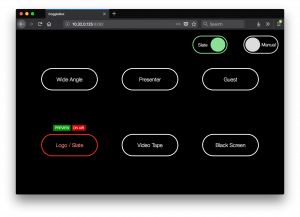
To change which camera/input is live, double click/tap it. The first click will put the camera into preview mode (this is important for technical reasons), and the second click will make it live. The live camera will not change unless you either shut GoggleBox, change the mode back to Auto, or click another camera.